Tabla de contenido
Publicidad
Idiomas disponibles
Idiomas disponibles
Enlaces rápidos
Thank you!
You've just purchased a Nuna product,
and you can be sure that your child is
getting the best there is. Our products
are expertly engineered for safety, with
luxury fabrics and sophisticated style.
Whatever made you fall in love with
Nuna, rest assured your adventures
with your little one will be easier from
now on, freeing you to enjoy more
happy family moments together.
Easy Installation
Our products are designed to make
your life easier, so installing this child
restraint doesn't require outside
assistance. While we encourage
the use of Certified Child Passenger
Safety Technicians to ensure you
have installed the seat correctly, you
can install the child restraint in your
vehicle without these professionals by
carefully reading and following these
instructions.
Publicidad
Capítulos
Tabla de contenido

Manuales relacionados para Nuna PIPA lite rx


Resumen de contenidos para Nuna PIPA lite rx
- Página 1 Thank you! You’ve just purchased a Nuna product, and you can be sure that your child is getting the best there is. Our products are expertly engineered for safety, with luxury fabrics and sophisticated style. Whatever made you fall in love with...
-
Página 2: Tabla De Contenido
REFERENCE: Using PIPA lite rx ™ READ CAREFULLY Product Overview Product Use Installation With PIPA RELX base ™ Child Restraint Only Install In an Aircraft On a Stroller Accessories Cleaning and Maintenance PIPA lite rx instructions PIPA lite rx instructions... -
Página 3: Product Information
70 Thousand Oaks Blvd. infousa@nunababy.com Morgantown, PA 19543 www.nunababy.com 1.855.NUNA.USA or call 1.855.NUNA.USA Recall Information For recall information, call the U.S. Government’s Vehicle Safety Hotline at: 1.888.327.4236 (TTY: 1.800.424.9153) or go to http://www.NHTSA.gov PIPA lite rx instructions PIPA lite rx instructions... -
Página 4: Child Usage Requirements
See page 11 Use the bottom of the base for to learn what is classified as a instruction manual storage. moderate to severe crash. PIPA lite rx instructions PIPA lite rx instructions... - Página 5 To find out if damaged can fall from a parts are replaceable, call shopping cart. 1-855-NUNA-USA. DO NOT use on NEVER modify any part of the a shopping cart. child restraint. PIPA lite rx instructions PIPA lite rx instructions...
-
Página 6: Car Seat Use After A Crash
Car Seat Use after DO NOT use any products or accessories with this child a Crash restraint unless they are approved by Nuna for use The National Highway Traffic with this child restraint. Doing Safety Administration (NHTSA) so may be unsafe and may recommends that car seats be void the warranty. -
Página 7: Vehicle Compatibility
Airbags inflate with great force and can cause severe injury to a child’s neck and spine. If your vehicle is equipped with PIPA lite rx instructions PIPA lite rx instructions... - Página 8 This belt cannot be used to install this child restraint. - Lap Belts forward of Seat Bight This belt (Where the seat bottom and seat back meet) should not be used to install this child restraint. PIPA lite rx instructions PIPA lite rx instructions...
-
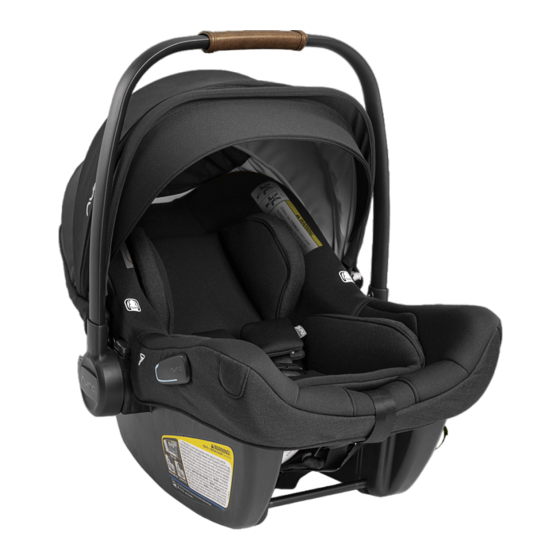
Página 9: Pipa ™ Lite Rx Parts List
Make sure all parts are available before assembly. The infant carrier module and base can be sold separately. If any part is missing, please contact Nuna (see page 5 for information). No tools are required for assembly. Head Support/Harness Height... -
Página 10: Pipa Relx
9 Child Restraint Release Button 10 Stability Leg 11 Stability Leg Adjustment Button 12 Stability Leg Indicator 13 Stability Leg Storage Release Button 14 Stability Leg Storage 15 Instruction Manual Storage (under Stability Leg) PIPA lite rx instructions PIPA lite rx instructions... -
Página 11: Product Overview
Magnetic Buckle Holders - Loosen and unbuckle harness. Place the buckle tongues against the magnetic area on the side of the child restraint so that the tongues are held in place. 20 PIPA lite rx instructions PIPA lite rx instructions... -
Página 12: Body Support
11 lb. - Remove the low birth weight pillow by opening the body support along the hook and loop strip (1) and pulling the pillow out (2). PIPA lite rx instructions PIPA lite rx instructions... - Página 13 (1) while pulling on the harness straps. Pull head support/harness height adjustment loop. Pull up or push down to adjust the height of the head support and the harness straps. 24 PIPA lite rx instructions PIPA lite rx instructions...
-
Página 14: Handle Adjustment
An unlocked handle could move unexpectedly, causing injury to child. Handle MUST NOT contact the Position 2 vehicle interior (side of car or seat in front) when installed. Position 3 26 PIPA lite rx instructions PIPA lite rx instructions... -
Página 15: Product Use
Gently guide child’s arms through harness straps. If more harness length is needed, see page 26 for instructions. (continued on the next page) 28 PIPA lite rx instructions PIPA lite rx instructions PIPA lite rx instructions PIPA lite rx instructions... - Página 16 Verify that the harness is snug around the child’s waist and shoulders. - Position the chest clip at child’s armpit level. (continued on the next page) click 30 PIPA lite rx instructions PIPA lite rx instructions...
- Página 17 Harness is snug – A snug harness cannot be pinched horizontally, and should not allow any slack. Chest clip is level with armpits. Harness straps are positioned at or below child’s shoulders. 32 PIPA lite rx instructions PIPA lite rx instructions...
- Página 18 If the stability leg indicator shows red, the stability leg is not making firm contact with the vehicle floor. Adjust as needed. Stability leg should be perpendicular to the floor. (continued on the next page) 34 PIPA lite rx instructions PIPA lite rx instructions...
- Página 19 Push until the release button clicks into place. The stability leg can be used or stored for both rigid latch and vehicle belt installation. 36 PIPA lite rx instructions PIPA lite rx instructions...
-
Página 20: Installation
Be sure that the base bottom is firmly seated on vehicle seating surface and there is no gap between the base bottom and vehicle seat. (continued on the next page) 38 PIPA lite rx instructions PIPA lite rx instructions... - Página 21 “click” indicates it’s locked into a retracted position. A gap is acceptable if the base clicks through all retracted positions but is still not fully against the vehicle seat. (continued on the next page) 40 PIPA lite rx instructions PIPA lite rx instructions...
-
Página 22: Check The Installation
It is acceptable to install with both rigid latch and the vehicle belt. (See vehicle belt installation on the next page.) 42 PIPA lite rx instructions PIPA lite rx instructions... - Página 23 - While pressing the base firmly downward onto the vehicle seat, (1) tighten the vehicle belt by pulling upward on the shoulder belt (2). (continued on the next page) 44 PIPA lite rx instructions PIPA lite rx instructions...
- Página 24 There should be no gap between the vehicle seat and the bottom of the base. It is acceptable to install with both rigid latch (p.38) and the vehicle belt. 46 PIPA lite rx instructions PIPA lite rx instructions...
-
Página 25: Recline Adjustment
Gently push or pull the top of the base until it locks into position. (continued on the next page) 48 PIPA lite rx instructions PIPA lite rx instructions... - Página 26 When Installed with Lap and Lap/Shoulder Belt: - Lift the lock off release button. - Unbuckle the vehicle belt and un- route the shoulder and lap belt from the base. Remove the base. 50 PIPA lite rx instructions PIPA lite rx instructions...
- Página 27 - Angle is correct when blue line on child restraint (located on the label on the side of the child restraint) is level with ground. (continued on the next page) 52 PIPA lite rx instructions PIPA lite rx instructions...
-
Página 28: Child Restraint Only Install
Blue line on label must be level with ground. Vehicle belt must be buckled, tight and must stay locked. Child restraint should be stable and not move side to side more than 1 inch at belt path. 54 PIPA lite rx instructions PIPA lite rx instructions... -
Página 29: In An Aircraft
Installation on a Stroller This infant carrier can attach to Nuna strollers as well as other brands of strollers using adapters (see next page). Adapters are sold separately. Visit nunababy.com for more information. -
Página 30: Accessories
This infant carrier can also attach to other brands of strollers using adapters. Visit nunababy.com for more information. PIPA series base PIPA lite rx is also compatible with the PIPA series base, sold separately. Attaches to Nuna TAVO without adapters 58 PIPA lite rx instructions... -
Página 31: Cleaning And Maintenance
Check regularly if everything functions properly. If any parts are torn, broken, or missing, stop using this product. Nuna Baby Essentials, Inc. Nuna and all associated logos are trademarks. 60 PIPA lite rx instructions... - Página 32 Uso del producto Instalación Con base PIPA RELX ™ Instalación del asiento infantil sin base En una aeronave En una carriola Accesorios Limpieza y mantenimiento 62 Instrucciones de la serie PIPA lite rx Instrucciones de la serie PIPA lite rx...
-
Página 33: Información Del Producto
1.855.NUNA.USA departamento de servicio al cliente. En los Estados Unidos: infousa@nunababy.com www.nunababy.com 1.855.NUNA.USA 64 Instrucciones de la serie PIPA lite rx Instrucciones de la serie PIPA lite rx... -
Página 34: Requisitos Para El Uso Con Niños
Consulte la página 71 para Use la parte inferior de la base información sobre la clasificacion para guardar el manual de de un choque de moderado a instrucciones. severo. 66 Instrucciones de la serie PIPA lite rx Instrucciones de la serie PIPA lite rx... -
Página 35: Riesgo De Sofocamiento
NO la use en 1-855-NUNA-USA. un carrito de NUNCA modifique ninguna de compras. las partes de la silla infantil. 68 Instrucciones de la serie PIPA lite rx Instrucciones de la serie PIPA lite rx... -
Página 36: Uso De La Silla Para Coche Despúes De Un Accidente
Comuníquese con Nuna en caso de dudas o preguntas relacionadas con su asiento. Información de nhtsa.gov 70 Instrucciones de la serie PIPA lite rx Instrucciones de la serie PIPA lite rx... -
Página 37: Compatibilidad Con El Vehículo
ésta esté desactivada. Las bolsas de aire se inflan con mucha fuerza y pueden causar 72 Instrucciones de la serie PIPA lite rx Instrucciones de la serie PIPA lite rx... - Página 38 Este cinturón (que se encuentra donde se unen la parte inferior del asiento y el respaldo) no debe usarse para instalar esta silla infantil para coche. 74 Instrucciones de la serie PIPA lite rx Instrucciones de la serie PIPA lite rx...
-
Página 39: Lista De Partes De Pipa ™ Lite Rx
22 Montaje de la capota 23 Barras para colocar la base 24 Correas del arnés del hombro 25 Placa divisora del arnés *Solo algunos modelos 76 Instrucciones de la serie PIPA lite rx Instrucciones de la serie PIPA lite rx... -
Página 40: Lista De Partes De La Base Pipa Relx
14 Compartimento de la pata para estabilizar 15 Compartimento del manual de instrucciones (debajo de la pata para estabilizar) 78 Instrucciones de la serie PIPA lite rx Instrucciones de la serie PIPA lite rx... -
Página 41: Generalidades Del Producto
Coloque las lengüetas de la hebilla contra el área magnética al lado de la silla infantil de tal forma que las lengüetas queden en su lugar. 80 Instrucciones de la serie PIPA lite rx Instrucciones de la serie PIPA lite rx... -
Página 42: Almohadillas Del Hombro
(1) y jale la almohada (2). 82 Instrucciones de la serie PIPA lite rx Instrucciones de la serie PIPA lite rx Instrucciones de la serie PIPA lite rx... - Página 43 - Jale hacia arriba o empuje hacia abajo para ajustar la altura del soporte de la cabeza y las correas del arnés. 84 Instrucciones de la serie PIPA lite rx Instrucciones de la serie PIPA lite rx...
-
Página 44: Ajuste De La Longitud Del Arnés 1
El asa NO debe entrar en contacto con el interior del vehículo (lado del coche o asiento del frente) cuando la Posición 3 instale. 86 Instrucciones de la serie PIPA lite rx Instrucciones de la serie PIPA lite rx... -
Página 45: Uso Del Producto
Guíe suavemente los brazos del niño a través de los lazos del arnés. Si necesita un arnés más largo, consulte instrucciones de la página 86. (continúa en la siguiente página) 88 Instrucciones de la serie PIPA lite rx Instrucciones de la serie PIPA lite rx... - Página 46 - Coloque en posición el cierre del pecho al nivel de la axila del clic niño. (continúa en la siguiente página) 90 Instrucciones de la serie PIPA lite rx Instrucciones de la serie PIPA lite rx...
-
Página 47: Asegurar Al Niño En La Silla Infantil (Continuacion)
El broche del pecho está al nivel de las axilas. Las correas del arnés están colocadas en o debajo de los hombros del niño. 92 Instrucciones de la serie PIPA lite rx Instrucciones de la serie PIPA lite rx... -
Página 48: Pata Para Estabilizar
Ajuste según sea necesario. La pata para estabilizar debe estar colocada perpendicularmente al piso. (continúa en la siguiente página) 94 Instrucciones de la serie PIPA lite rx Instrucciones de la serie PIPA lite rx... - Página 49 La pata para estabilizar se puede usar o guardar para instalar tanto el cerrojo rígido como el cinturón del vehículo. 96 Instrucciones de la serie PIPA lite rx Instrucciones de la serie PIPA lite rx...
-
Página 50: Instalación
(continúa en la siguiente página) 98 Instrucciones de la serie PIPA lite rx Instrucciones de la serie PIPA lite rx... - Página 51 Un espacio es aceptable si la base hace clic en todas las posiciones retraídas pero aún no está completamente colocada contra el asiento del vehículo. (continúa en la siguiente página) 100 Instrucciones de la serie PIPA lite rx Instrucciones de la serie PIPA lite rx...
-
Página 52: Instalación De La Base
Es aceptable instalar tanto con el cerrojo rígido como con el cinturón del vehículo. (Ver instalación del cinturón del vehículo en la siguiente página.) 102 Instrucciones de la serie PIPA lite rx Instrucciones de la serie PIPA lite rx... - Página 53 (1) apriete el cinturón del vehículo jalando hacia arriba el cinturón del hombro (2). (continúa en la siguiente página) 104 Instrucciones de la serie PIPA lite rx Instrucciones de la serie PIPA lite rx...
-
Página 54: Instalación De La Base Pipa
Es aceptable instalar tanto con el cerrojo rígido (pag. 98) como con el cinturón del vehículo. 106 Instrucciones de la serie PIPA lite rx Instrucciones de la serie PIPA lite rx... -
Página 55: Colocación De La Silla Infantil
Empuje suavemente o jale la parte superior de la base hasta que se bloquee en su posición. (continúa en la siguiente página) 108 Instrucciones de la serie PIPA lite rx Instrucciones de la serie PIPA lite rx... - Página 56 6 - Abra la hebilla del cinturón del vehículo y retire el cinturón del hombro y del regazo de la base. Retire la base. 110 Instrucciones de la serie PIPA lite rx Instrucciones de la serie PIPA lite rx...
- Página 57 (que se localiza en la etiqueta al lado de la silla infantil) está a nivel del suelo. (continúa en la siguiente página) 112 Instrucciones de la serie PIPA lite rx Instrucciones de la serie PIPA lite rx...
-
Página 58: Instalación Del Asiento
La silla infantil no se debe mover de lado a lado más de 1" a lo largo del cinturón. 114 Instrucciones de la serie PIPA lite rx Instrucciones de la serie PIPA lite rx... -
Página 59: Instalación En Una Aeronave
(ver página siguiente). Los adaptadores se venden por separado. Visite nunababy.com para mayor información. Se colocar en Nuna TAVO sin adaptadores 116 Instrucciones de la serie PIPA lite rx Instrucciones de la serie PIPA lite rx... -
Página 60: Accesorios
PIPA lite rx también es compatible con la base de la serie PIPA, que se vende por separado. Se colocar en Nuna TAVO sin adaptadores 118 Instrucciones de la serie PIPA lite rx Instrucciones de la serie PIPA lite rx... -
Página 61: Limpieza Y Mantenimiento
Verifique regularmente que todo funciona adecuadamente. Si alguna pieza está desgastada, rota o falta, deje de usar el producto. Nuna Baby Essentials, Inc. Los logotipos de Nuna y de todos sus asociados son marcas registradas. 120 Instrucciones de la serie PIPA lite rx...